设置Title标题
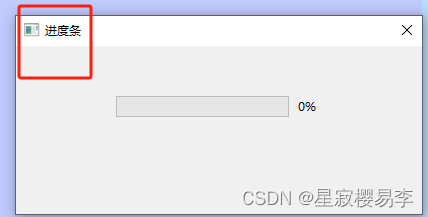
import sysfrom PyQt5.QtGui import QIconfrom PyQt5.QtWidgets import QApplication, QWidget class Logo(QWidget): def __init__(self): super().__init__() self.initUI() def initUI(self): # self.setGeometry(300, 300, 300, 220) self.setWindowTitle('MyLogo') # self.move(300, 300) self.show() if __name__ == "__main__": app = QApplication(sys.argv) ex = Logo() sys.exit(app.exec_())一、父控件设置样式表后对子控件产生影响,控制styleSheet的作用范围
https://blog.csdn.net/qq_31073871/article/details/90288625
QFrame 作为容器,放入其他多种部件,里面的边框都生效
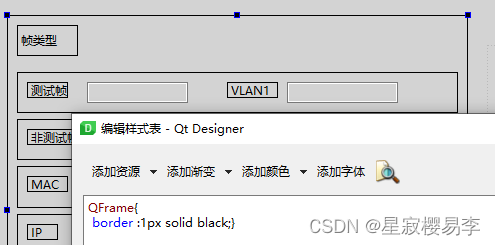
在类名后面用 #号串接变量名,子控件不受影响,达到预期效果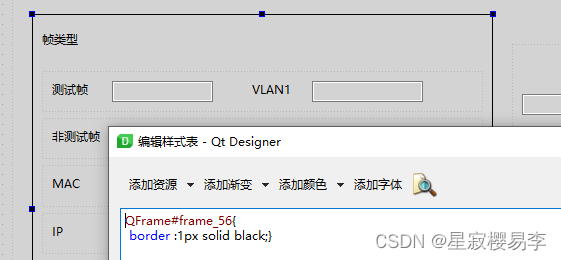
二、border
border属性:设置元素的边框样式。可同时设置边框宽度、边框样式、边框颜色。也可单独设置上边、右边、下边、左边的边框。
border-width:边框宽度。可以指定长度值。如1px,1em(单位为px,pt,em等)。或者使用关键字medium(默认),thick,thin。
border-top-width:设置元素上边框宽度
border-right-width:设置元素右边框宽度
border-bottom-width:设置元素下边框宽度
border-left-width:设置元素左边框宽度
border-style:边框样式。
border-top-style:设置元素上边框样式
border-right-style:设置元素右边框样式
border-bottom-style:设置元素下边框样式
border-left-style:设置元素左边框样式
参考:多种样式例子 https://www.jianshu.com/p/54283902d4f7
边框样式(border-style)
none: 无样式;
hidden: 同样是无样式,主要用于解决和表格的边框冲突;
dotted: 点划线;
dashed: 虚线;
solid: 实线;
double: 双线,两条线加上中间的空白等于border-width的取值;
groove: 槽状;
ridge: 脊状,和groove相反;
inset: 凹陷;
outset:凸出,和inset相反;
border :1px solid black; # 边框黑实线例子 1border-style:dotted solid double dashed;上边框是点状右边框是实线下边框是双线左边框是虚线例子 2border-style:dotted solid double;上边框是点状右边框和左边框是实线下边框是双线例子 3border-style:dotted solid;上边框和下边框是点状右边框和左边框是实线例子 4border-style:dotted;所有 4 个边框都是点状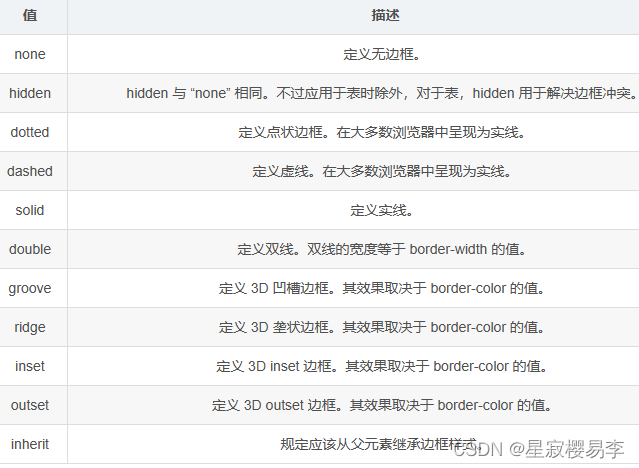
三、pushButton 灯设置
3.1 代码控制
self.result_UI.pushButton_11.setStyleSheet( '''min-width: 16px; min-height: 16px;max-width:16px; max-height: 16px;border-radius: 8px; border:1px solid black;background:red;}''') # 亮红 self.result_UI.pushButton_12.setStyleSheet( '''min-width: 16px; min-height: 16px;max-width:16px; max-height: 16px;border-radius: 8px; border:1px solid black;background-color: rgb(58, 111, 50);}''') # 暗绿self.System_UI.pushButton_6.setEnabled(False) # 是否启用
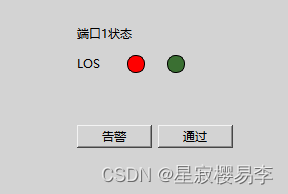
def red(self): self.result_UI.pushButton_11.setStyleSheet( '''min-width: 16px; min-height: 16px;max-width:16px; max-height: 16px;border-radius: 8px; border:1px solid black;background:red;}''') # 亮红 self.result_UI.pushButton_11.setStyleSheet( '''min-width: 16px; min-height: 16px;max-width:16px; max-height: 16px;border-radius: 8px; border:1px solid black;background-color: rgb(58, 111, 50);}''') # 暗绿 def green(self): self.result_UI.pushButton_11.setStyleSheet( '''min-width: 16px; min-height: 16px;max-width:16px; max-height: 16px;border-radius: 8px; border:1px solid black;background-color: rgb(0, 234, 0);}''') # 亮绿 self.result_UI.pushButton_11.setStyleSheet( '''min-width: 16px; min-height: 16px;max-width:16px; max-height: 16px;border-radius: 8px; border:1px solid black; background-color: rgb(117, 0, 0);}''') # 暗红3.2 QT Designer 设置
min-width: 16px; min-height: 16px;max-width:16px; max-height: 16px;border-radius: 8px; border:1px solid black;background-color: rgb(144, 144, 144);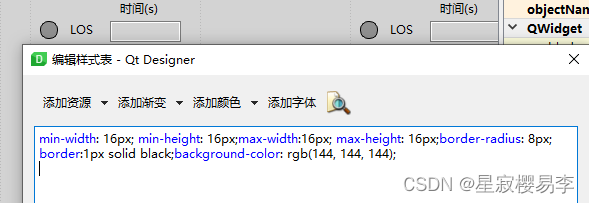
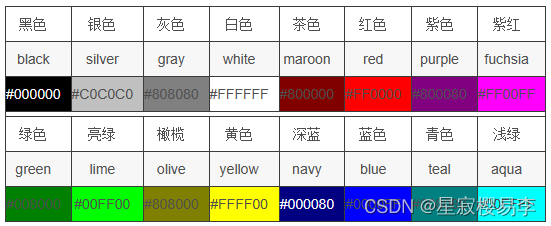
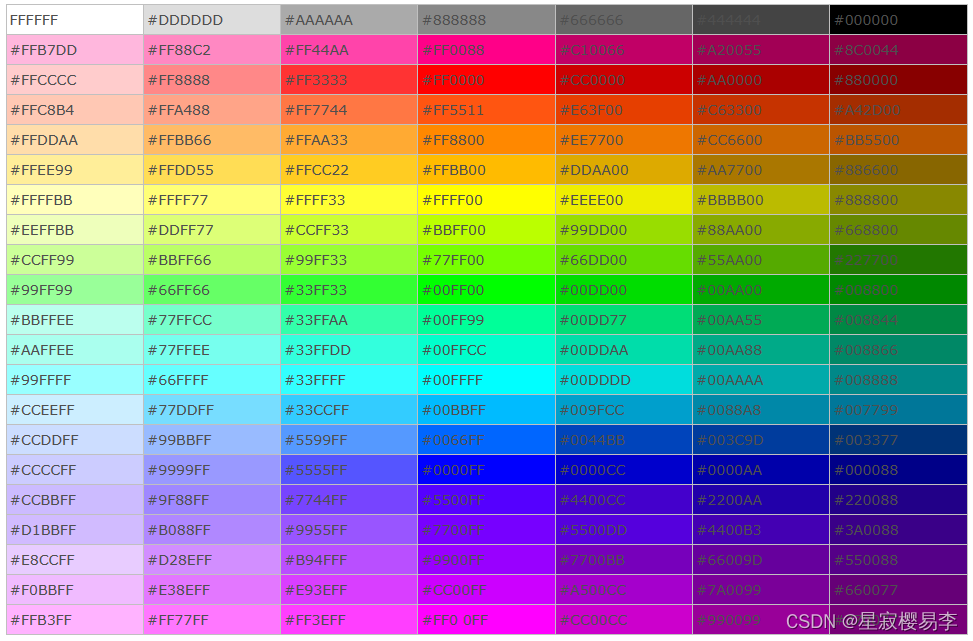
四、CSS 样式颜色对照表
