1.安装nodejs服务器。
java 项目可以运行在 tomcat 服务器,开始完成前后端完全分离。前端有自己独立的工程。我们需 要把前端独立的工程运行起来。 --- 运行在 nodejs 服务器下。 理解为 tomcat 服务器 安装成功后在命令窗口查看
1.1 安装npm
java 项目需要依赖 jar ,安装 maven 。 前端项目需要依赖第三方的插件。比如 axios elementui echarts 前端也需要一个管理组件的软件。 npm. 如果 package.json 文件 类似于 pom.xml 文件。 npm 通过该文件 package.json 文件安装依赖的插件。 如果安装了 node 默认 安装了 npm. 验证 : npm -v
2. 安装vue cli的脚手架
帮你创建前端项目工程。它的安装需要依赖上面的npm
2.1 安装vue cli
npm install -g @vue/cli -g: global 全局 验证是否安装成功 : vue --version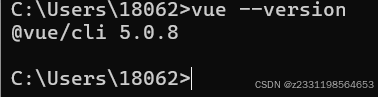
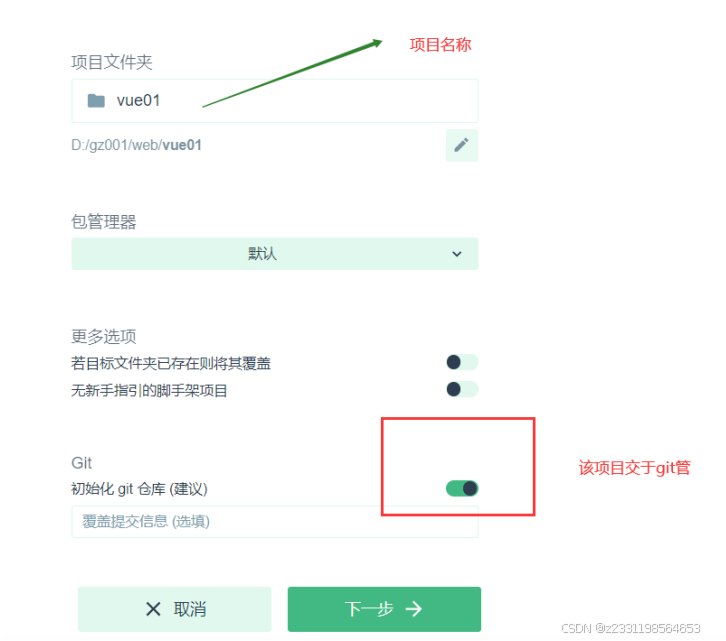
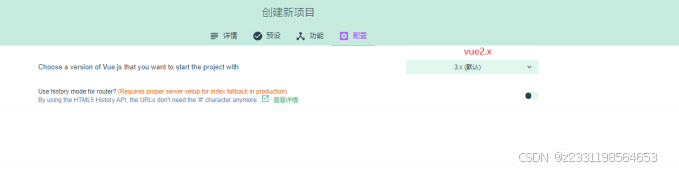
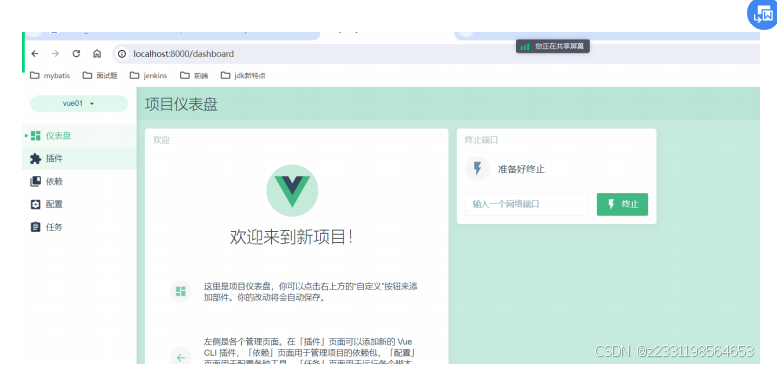
3. 使用vuecli搭建vue前端项目
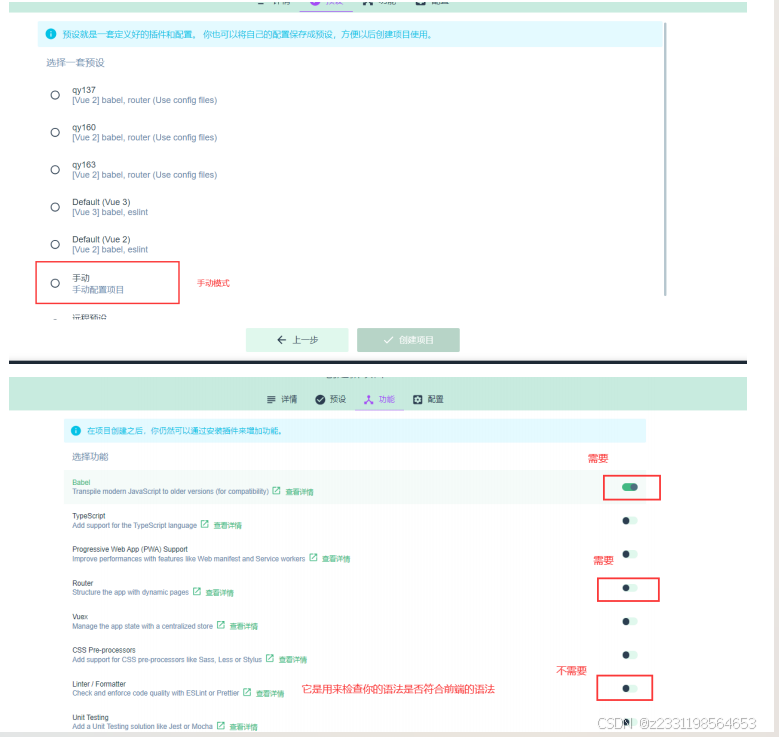
第一种使用命令 : vue create 第二种使用图形化界面: vue ui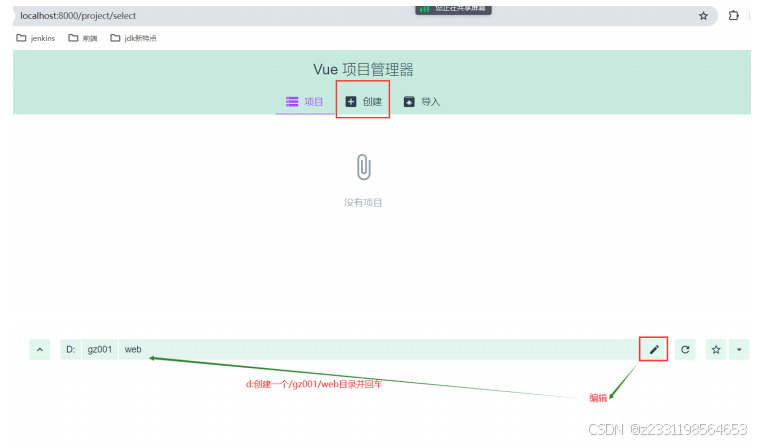
3.1 安装相应的插件--elementui
安装插件有两种方式 : 第一种使用命令 : npm i element-ui -S 第二种使用图形化 :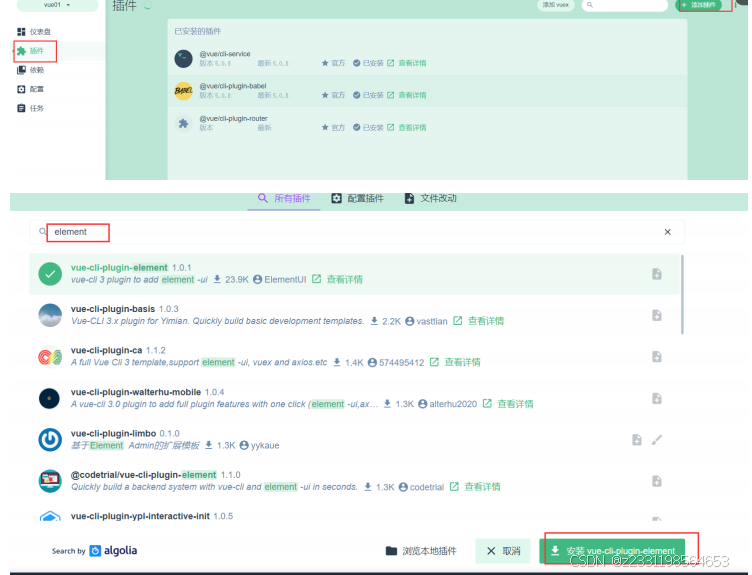
2.2 安装axios依赖
发送异步请求的。 第一种命令 : npm i -S axios 第二种图形化 : 如下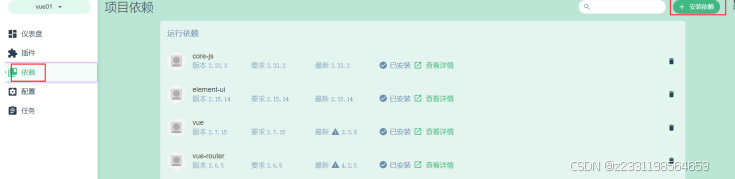
4. 使用客户端软件打开vue工程
vscode [ 专业的前端工具 ] webstorm [idea 团队开发的软件 -- 只要会使用 idea 那么也会使用该工具 ] hbuilder [ 适合前端 ] 在 webstorm 中启动该项目
  vue 原理
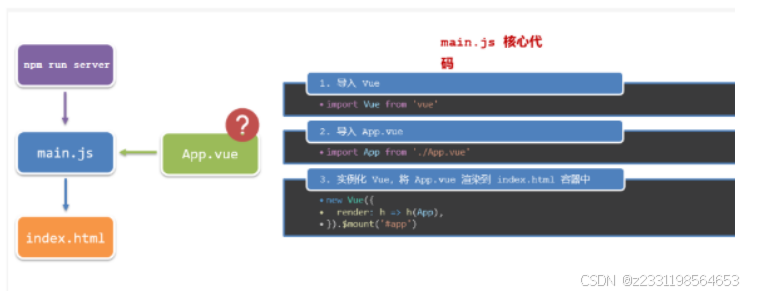
5. 组件化开发
组件化:一个页面可以拆分成一个个组件,每个组件有着自己独立的结构 [html] 、样式 [css] 、行为 [js] 。 好处:便于维护,利于复用 → 提升开发效率。 组件分类:普通组件、根组件。 比如:下面这个页面,可以把所有的代码都写在一个页面中,但是这样显得代码比较混乱,难易维 护。咱们可以按模块进行组件划分
6. 根组件 App.vue
1. 根组件介绍 整个应用最上层的组件,包裹所有普通小组件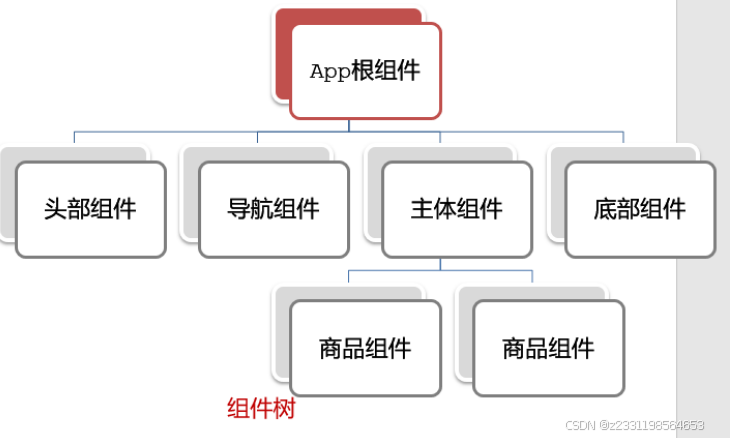 2. 组件是由三部分构成 三部分构成 template :结构 (有且只能一个根元素) script: js 逻辑 style : 样式 ( 可支持 less ,需要装包 ) 让组件支持 less ( 1 ) style 标签, lang="less" 开启 less 功能 ( 2 ) 装包 : yarn add less less-loader -D 或者 npm i less less-loader -D
 7. 普通组件的注册使用
普通组件的注册有两种方式。 ( 1 )局部注册: ( 2 )全局注册 普通组件的注册使用 - 局部注册 1. 特点: 只能在注册的组件内使用 2. 步骤: 1. 创建 .vue 文件(三个组成部分) 2. 在使用的组件内先导入再注册,最后使用 3. 使用方式: 当成 html 标签使用即可 < 组件名 ></ 组件名 > 4. 注意: 组件名规范 —> 大驼峰命名法, 如 AAAHeader 5. 语法:// 导入需要注册的组件// import 组件对象 from '.vue文件路径'import AAAHeader from './components/AAAHeader'export default {• // 局部注册components: {'组件名': 组件对象,AAAHeader:AAAHeader,AAAHeader}}8. 组件通信
1. 什么是组件通信? 组件通信,就是指 组件与组件 之间的 数据传递 组件的数据是独立的,无法直接访问其他组件的数据。 想使用其他组件的数据,就需要组件通信 2. 组件之间如何通信 3. 组件关系分类 1. 父子关系 2. 非父子关系
  5. 父子通信流程 1. 父组件通过 props 将数据传递给子组件 [ 重点 ] 2. 子组件利用 $emit 通知父组件修改更新
 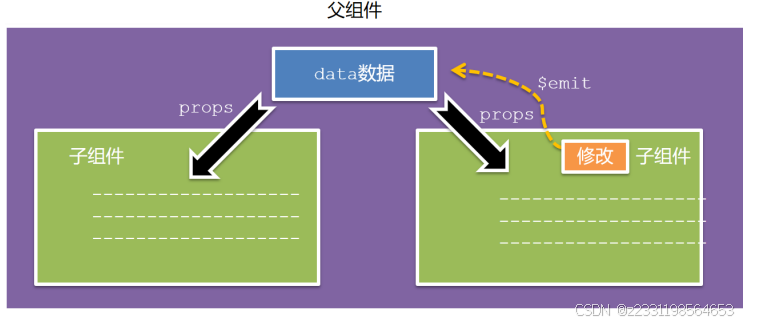 6. 父向子通信代码示例 父组件通过 props 将数据传递给子组件 父组件 App.vue
  父向子传值步骤 1. 给子组件以添加属性的方式传值 2. 子组件内部通过 props 接收 3. 模板中直接使用 props 接收的值
 9.路由介绍
9.1.思考
单页面应用程序,之所以开发效率高,性能好,用户体验好 最大的原因就是: 页面按需更新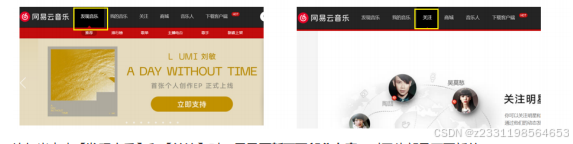 比如当点击【发现音乐】和【关注】时, 只是更新下面部分内容 ,对于头部是不更新的 要按需更新,首先就需要明确: 访问路径 和 组件 的对应关系! 0. 子组件向父组件传值 1. 什么是路由 2. 如何配置路由 3. 路由传参 4. 前端访问后端代码 5 访问路径 和 组件的对应关系如何确定呢? 路由 路由 : 就是路径和组件建立关联关系的过程。
 9.2 vue中如何使用路径
我们刚才演示了路由的基本使用。 --- 通过在地址栏输入路由地址,在根据路由配置找到对应的组 件,并渲染该组件。 ( 1 )第一种 : 声明式路径<router-link to="/login">登录</router-link> methods:{my(){//路由跳转---编码式路由this.$router.push("/register")}}9.3. 路由传递
9.3.1 声明路由--查询参数
类似于之前 路由也是这种模式 对应的组件接受查询参数。 this.$route.query. 参数名9.3.2 声明路由--动态路由参数
2. 路由配置时 : { path="/ 路由路径 /: 参数名 "} 3. 相应的组件中接受参数值 this.$route.params. 参数名9.3.3 查询参数和动态路由参数
1. 查询参数传参 ( 比较适合传 多个参数 ) 1. 跳转: to="/path? 参数名 = 值 & 参数名 2= 值 " 2. 获取: this.$route.query. 参数名 2. 动态路由传参 ( 优雅简洁 ,传单个参数比较方便 ) 1. 配置动态路由: path: "/path/: 参数名 " 2. 跳转: to="/path/ 参数值 " 3. 获取: this.$route.params. 参数名 <router-link to="/login"> 登录 </router-link> 1 methods:{ my(){ // 路由跳转 --- 编码式路由 this.$router.push("/register") } } const originalPush = VueRouter.prototype.push // 修改原型对象中的 push 方法 VueRouter.prototype.push = function push(location) { return originalPush.call(this, location).catch(err => err) } 5 注意:动态路由也可以传多个参数,但一般只传一个 准备传递参数 --- 查询参数和动态路由参数9.3.4 编码路由--查询参数
my(){//路由跳转---编码式路由//简写版://this.$router.push("/my?name=ldh&age=18")//完整版this.$router.push({path: "/my",query:{name:"张嘉琪",age:88},})}created() {this.name=this.$route.query.name;this.age=this.$route.query.age;}9.3.5 编码路由--动态路由参数
//动态路由参数--简介版// this.$router.push("/my/zcj")this.$router.push({// path:"/my", //表示路由的path的值name:"My", //表示路由的名称params:{key:"wzy"}})//path不能和params配合使用。 name可以和params配合使用//create()created() {this.name=this.$route.params.key;// this.name=this.$route.query.name;// this.age=this.$route.query.age;}当出现NavigationDuplicated: Avoided redundant navigation to current location: "/register".问题时
解决方案 : /router/index.js 添加如下代码 Vue-Router3.0const originalPush = VueRouter.prototype.push//修改原型对象中的push方法VueRouter.prototype.push = function push(location) {return originalPush.call(this, location).catch(err => err)}