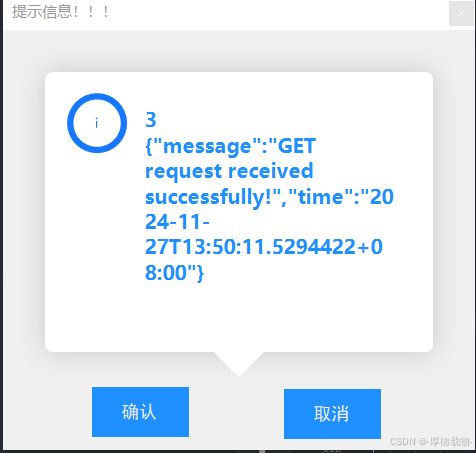
本文分两部分:
第一部分:搭建本地ASP.Net Core Web API环境
自己建立api接口可以方便本机进行测试
在VisualStudio新建项目
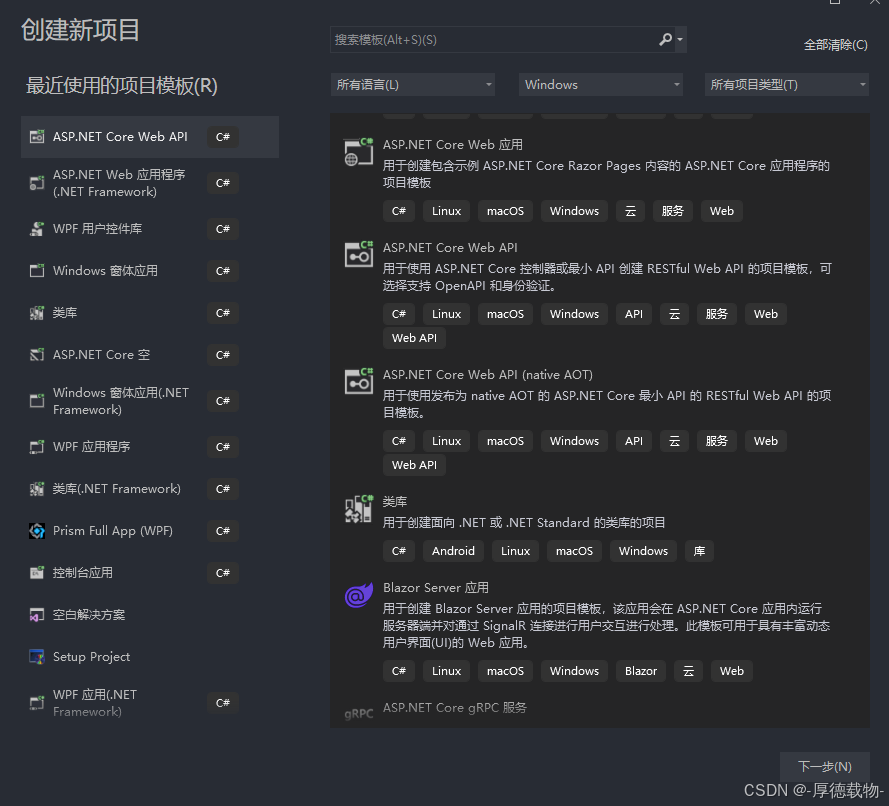
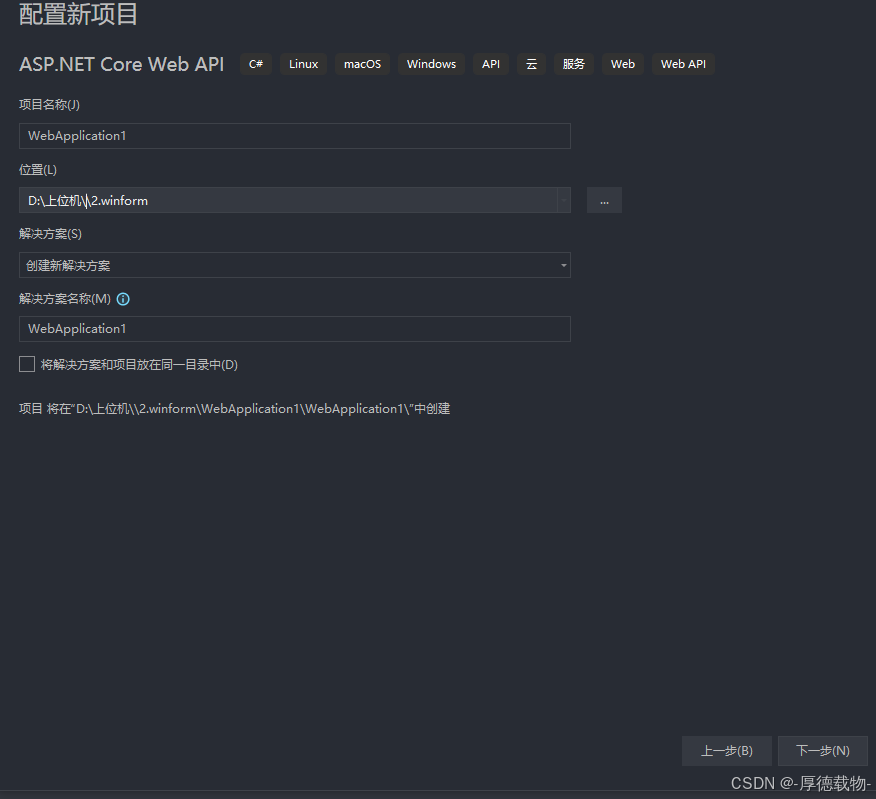
点击下一步,不用配置HTTPS,我用的是.NET8环境,根据自己实际需要去进行选择
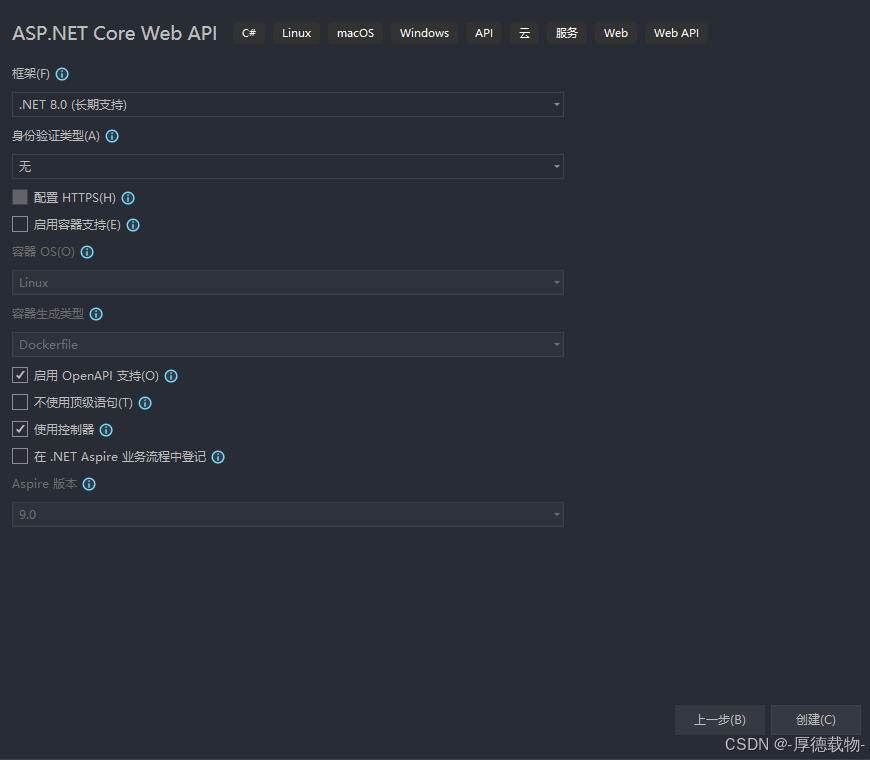
创建API方法并使用swagger
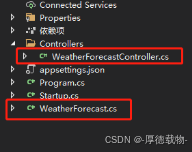
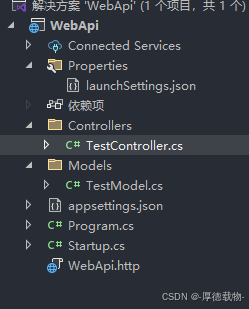
这是项目自带的文件,我们删除重新创建自己实际需要的控制器
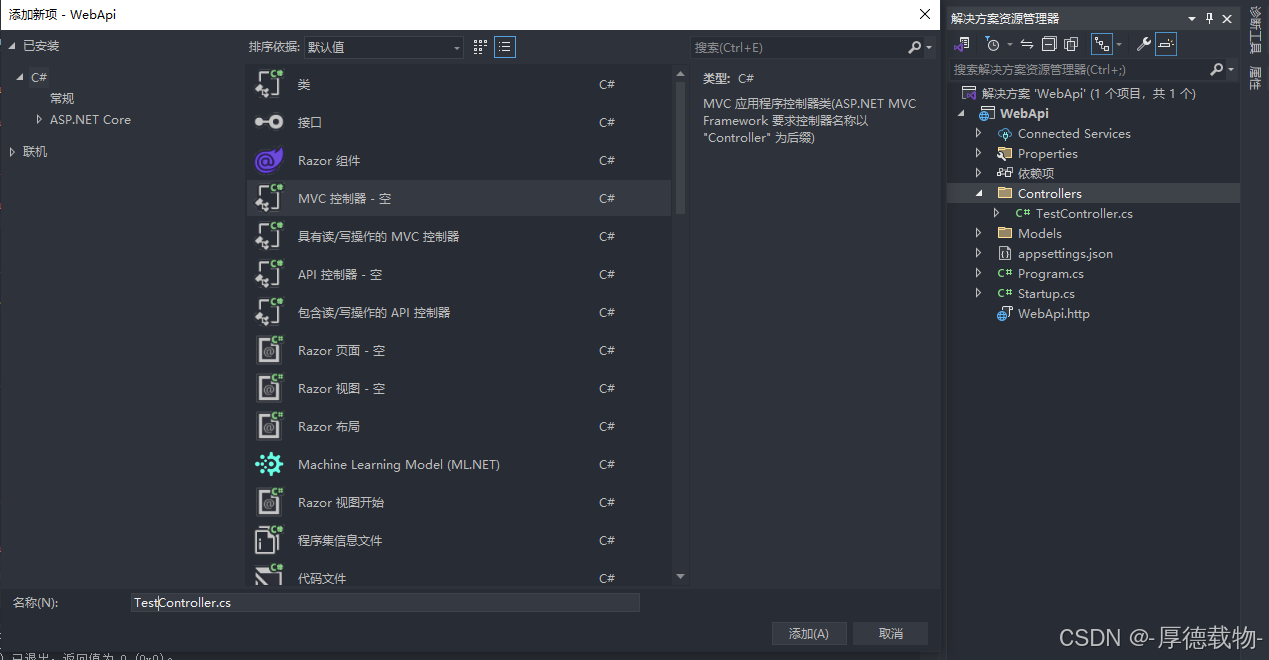
右键新建MVC控制器
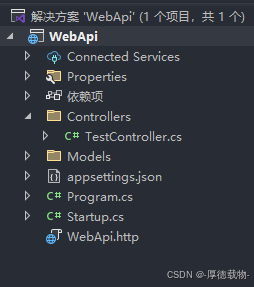
新建一个api方法,把控制器上的路径补充完整,方法的请求方式根据实际业务来,这里用get请求

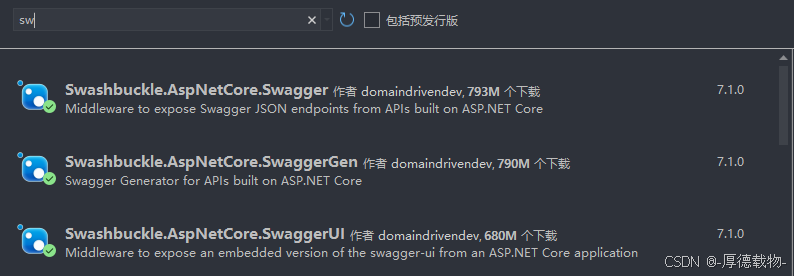
[Route("api/[controller]/[action]")]然后下载swagger组件,下载这三个
下载完毕后在StartUp文件去进行注册,没有文件的话新建一个
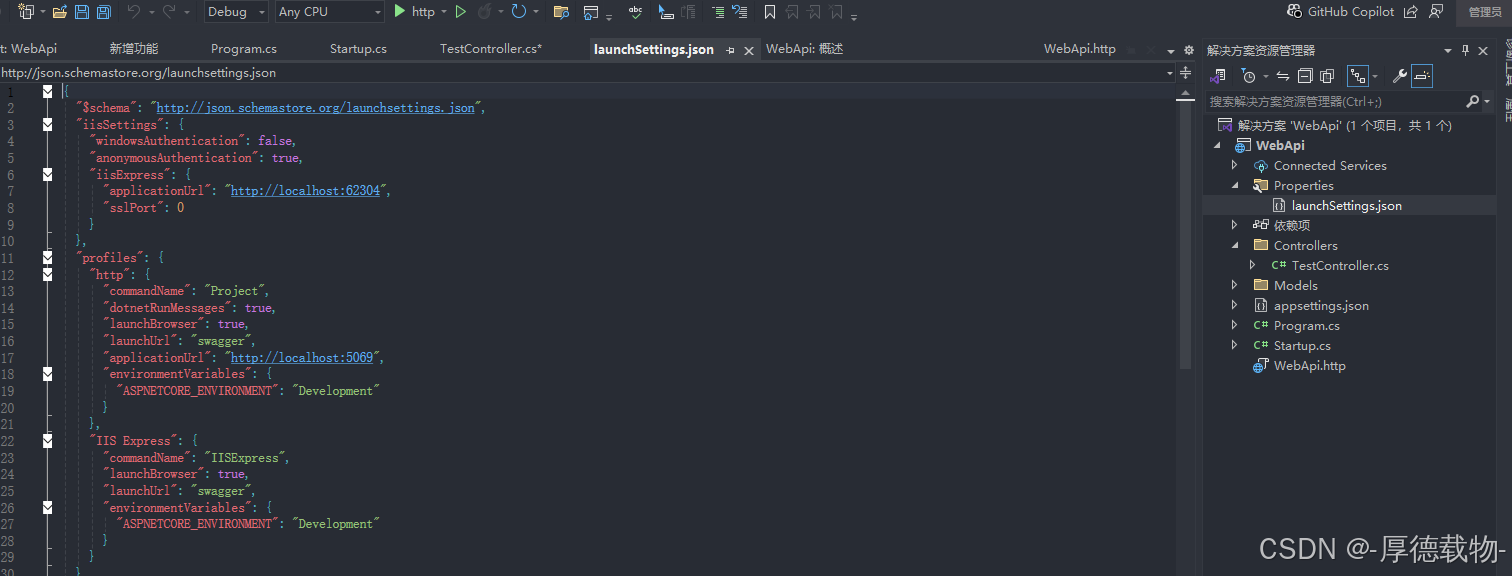
public class Startup { public Startup(IConfiguration configuration) { Configuration = configuration; } public IConfiguration Configuration { get; } public void ConfigureServices(IServiceCollection services) { services.AddControllers(); // 添加 MVC 控制器服务 services.AddSwaggerGen(c => { c.SwaggerDoc("v1", new OpenApiInfo { Title = "ID Build Api", Version = "v1" }); });//使用Swagger } public void Configure(IApplicationBuilder app, IWebHostEnvironment env) { if (env.IsDevelopment()) { app.UseDeveloperExceptionPage(); } app.UseRouting(); //手动新增swagger注册 app.UseSwagger(); app.UseEndpoints(endpoints => { endpoints.MapControllers(); // 配置控制器路由 }); app.UseSwaggerUI(c => { c.SwaggerEndpoint( "v1/swagger.json","ID Build V1");//使用swagger交互UI模式 }); } }在LaunchSettings.json文件中去观察Http和Express中的LaunchUrl是否更改成swagger,没有更改的话手动更改
在TestController中输入下列代码,Get和post是方便上位机客户端进行get或post获取响应代码,Test是自己手动运行程序进行简单测试一下
[HttpGet] public IActionResult Get() { var result = new { Message = "GET request received successfully!", Time = DateTime.Now }; return Ok(result); } [HttpGet] public string Test() { return "返回Test"; } [HttpPost] public ActionResult<TestModel> Post([FromBody] TestModel model) { if (model == null) { return BadRequest("Invalid input data."); // 返回 400 Bad Request } model.sum = model.num1 + model.num2; // 返回成功结果 return Ok(model); // 返回 200 OK,并附带数据 }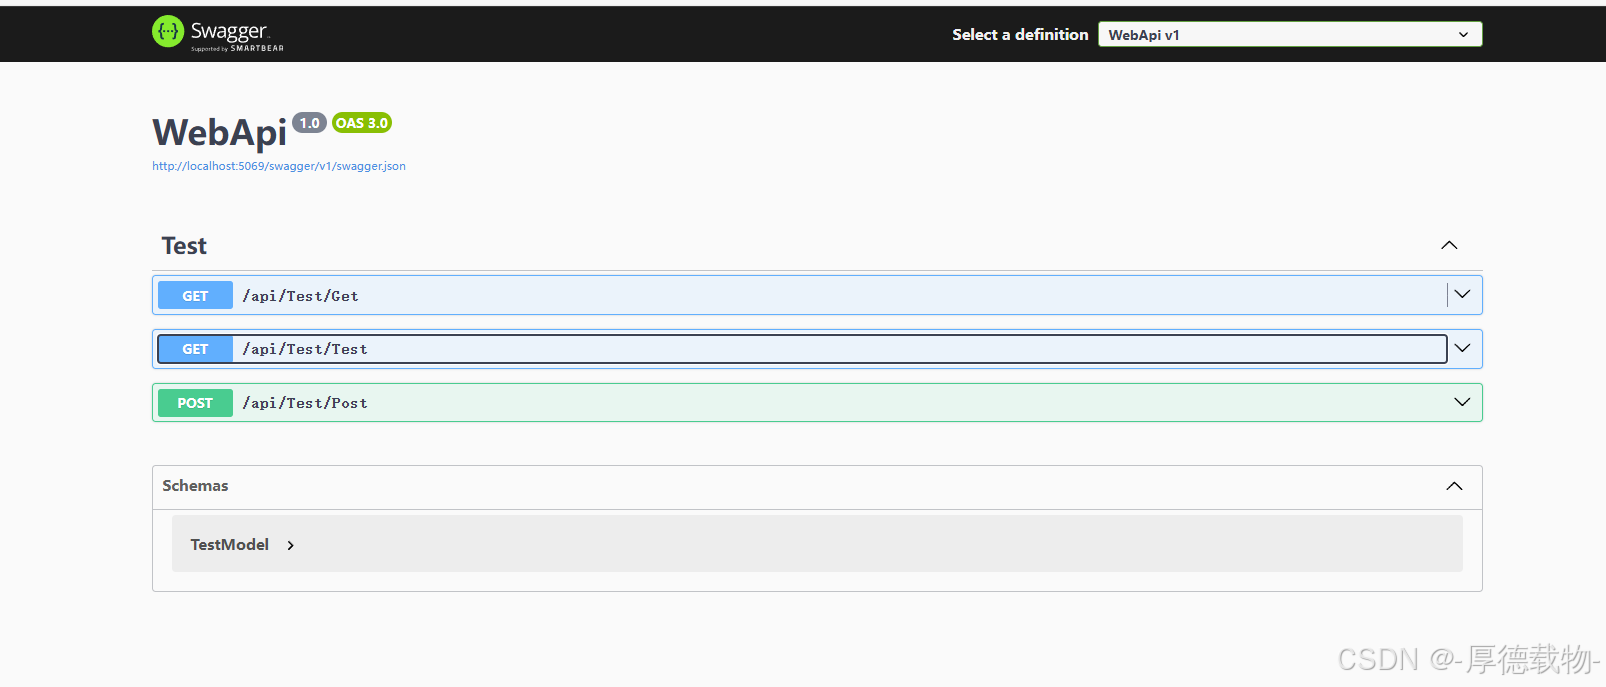
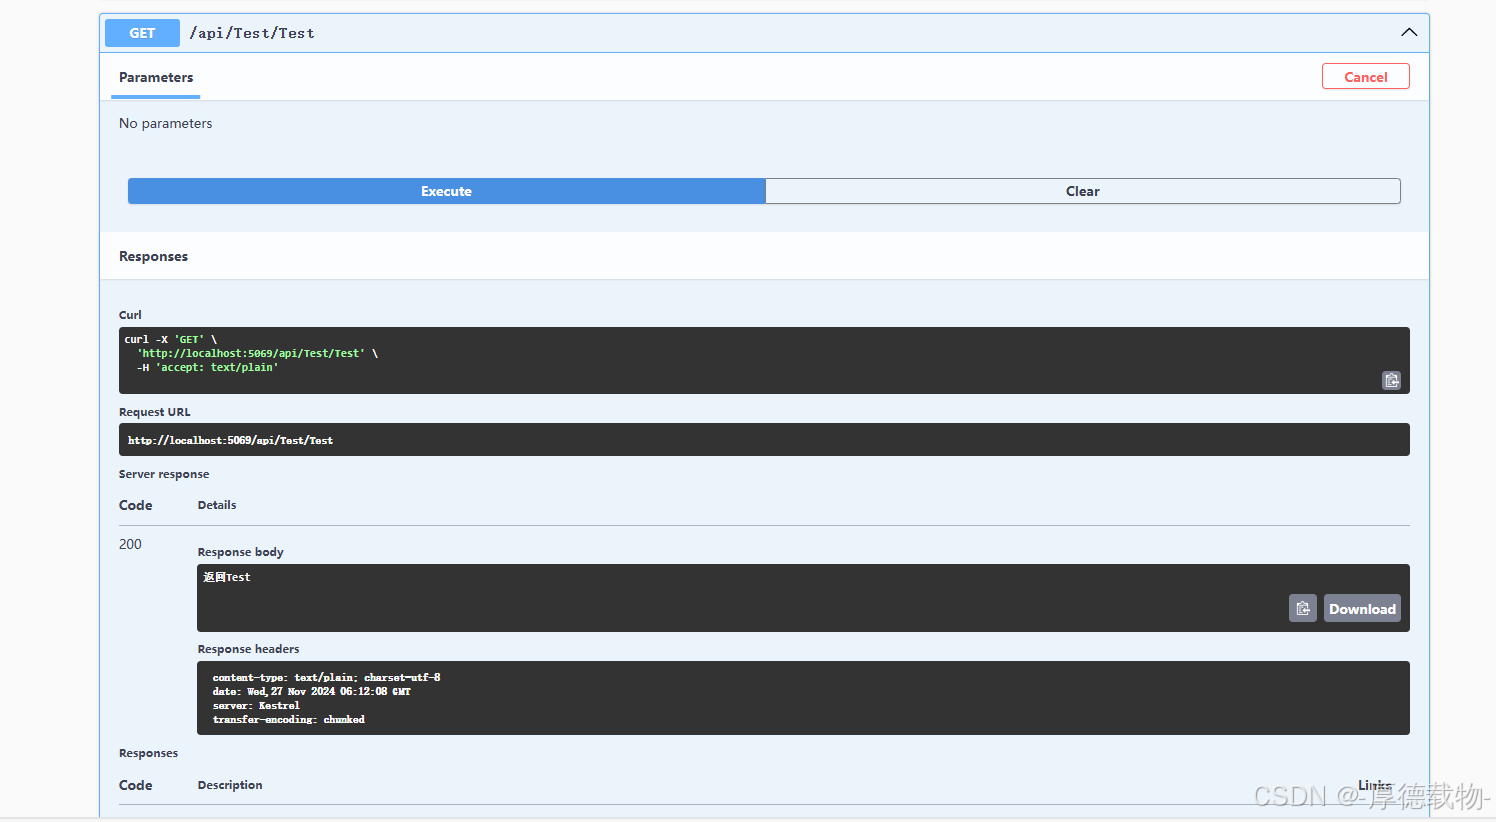
点击execute获取测试值
第二部分:搭建客户端winfom
新建项目=》选择Windows窗体,填写你的项目名称


在from窗体中添加一个button按钮,双击进去自动生成Click事件
这是我封装好的请求代码
/// <summary> /// /// </summary> /// <param name="url"></param> /// <returns></returns> /// <exception cref="HttpRequestException"></exception> public static async Task<string> GetAsync(string url) { using var client = new HttpClient(); try { // 发送 GET 请求 HttpResponseMessage response = await client.GetAsync(url); response.EnsureSuccessStatusCode(); // 确保返回成功 // 读取响应内容 string content = await response.Content.ReadAsStringAsync(); return content; } catch (Exception ex) { throw new HttpRequestException($"GET request failed: {ex.Message}", ex); } } /// <summary> /// 封装post请求代码 /// </summary> /// <typeparam name="TResult">根据实际需要建立对应的数据模型类</typeparam> /// <param name="url"></param> /// <param name="data"></param> /// <returns></returns> public static TResult Post<TResult>(string url, object data) { using HttpClient client = new HttpClient(); try { // 序列化数据为 JSON var jsonData = JsonConvert.SerializeObject(data); // 创建请求内容 HttpContent content = new StringContent(jsonData, Encoding.UTF8, "application/json"); // 发送 POST 请求 HttpResponseMessage res = client!.PostAsync(url, content).Result; // 检查响应是否成功 if (res.StatusCode == System.Net.HttpStatusCode.OK) { string resMsgStr = res.Content.ReadAsStringAsync().Result; var result = JsonConvert.DeserializeObject<TResult>(resMsgStr); return result!; } else { MessageView.Ins.MessageBoxShow(res.StatusCode.ToString(), 3); return default!; } } catch (Exception ex) { MessageView.Ins.MessageBoxShow(ex.Message, 3); return default!; } } /// <summary> /// 发送http请求 /// </summary> /// <param name="url">目标服务器的地址</param> /// <param name="method">请求方式</param> /// <param name="data">请求体数据</param> /// <param name="isJson">请求体是否为json格式</param> /// <returns></returns> public static async Task<string> Send(string url, HttpType method = HttpType.GET, string data = "", bool isJson = false) { using HttpClient client = new HttpClient(); try { HttpRequestMessage request = new HttpRequestMessage { Method = new HttpMethod(method.ToString()), RequestUri = new Uri(url) }; // 如果是 POST 或 PUT,写入请求体 if (method == HttpType.POST || method == HttpType.PUT) { request.Content = new StringContent( data, Encoding.UTF8, isJson ? "application/json" : "application/x-www-form-urlencoded" ); } // 发送请求并获取响应 HttpResponseMessage response = await client.SendAsync(request); // 确保请求成功 response.EnsureSuccessStatusCode(); // 读取响应内容 string result = await response.Content.ReadAsStringAsync(); return result; } catch (Exception ex) { // 捕获异常并返回错误信息 return $"Error: {ex.Message}"; } }在button事件中添加代码调用
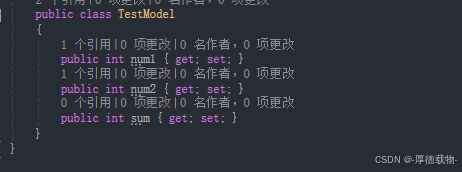
var model = new TestModel { num1 = 1 ,num2 = 2}; var data = Commons.Post<TestModel>("http://localhost:5069/api/test/Post", model); var data2 = await Commons.GetAsync("http://localhost:5069/api/test/Get"); string jsonData = "{ \"num1\": 20, \"num2\": 30 }"; string response = await Commons.Send("http://localhost:5069/api/test/Post", HttpType.POST, jsonData,true); AddLog.Info(response);TestModel是自己在客户端建立的数据模型类,服务端api也是需要建立相应的model类内容一致
最后可以得到api服务器返回的结果
