
文章目录
一、前言①什么是Thymeleaf?②特点 二、Thymeleaf的使用1、完成Thymeleaf入门⑴新建一个SpringBoot项目demo_thymeleaf⑵项目-完整代码⑶效果图 2、对Thymeleaf的基础认识⑴创建模板⑵使用文本⑶标准表达式语法⑷条件判断 想要了解更多
一、前言
①什么是Thymeleaf?
Thymeleaf是一个现代服务器端Java模板引擎,适用于Web和独立环境,能够处理HTML,XML,JavaScript,CSS甚至纯文本。
Thymeleaf的主要目标是提供一种优雅且高度可维护的模板创建方式。为实现这一目标,它以自然模板的概念为基础,将其逻辑注入模板文件,其方式不会影响模板被用作设计原型。这改善了设计沟通,缩小了设计和开发团队之间的差距。
Thymeleaf也从一开始就设计了Web标准 - 特别是HTML5 - 允许您创建完全验证的模板,如果您需要的话。
②特点
动静分离: Thymeleaf选用html作为模板页,这是任何一款其他模板引擎做不到的!Thymeleaf使用html通过一些特定标签语法代表其含义,但并未破坏html结构,即使无网络、不通过后端渲染也能在浏览器成功打开,大大方便界面的测试和修改。
开箱即用: Thymeleaf提供标准和Spring标准两种方言,可以直接套用模板实现JSTL、 OGNL表达式效果,避免每天套模板、改JSTL、改标签的困扰。同时开发人员也可以扩展和创建自定义的方言。
二、Thymeleaf的使用
1、完成Thymeleaf入门
主要步骤:添加thymeleaf的依赖,创建一个控制类controller,在templates下创建一个html页面即可。
⑴新建一个SpringBoot项目demo_thymeleaf
点击File->Project ->Srping Initializr点击下一步(Next)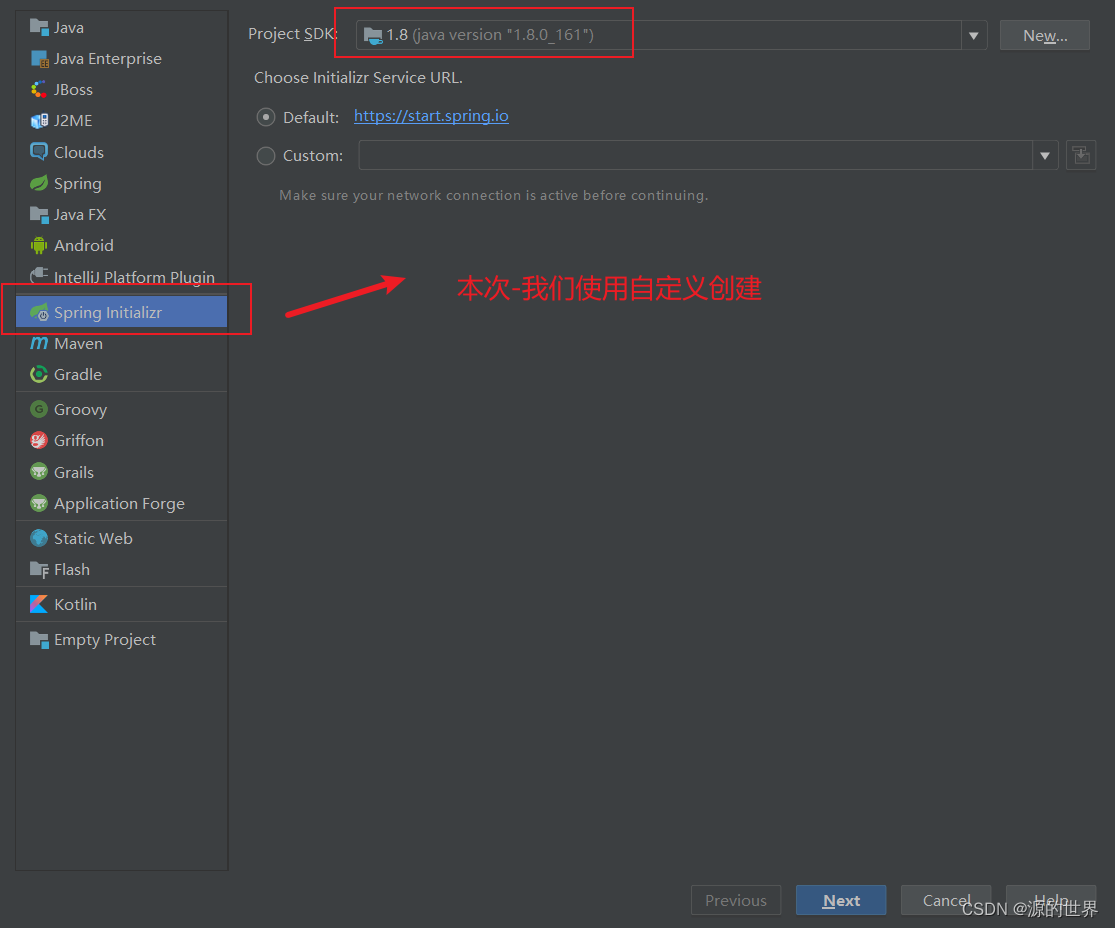
完善信息后-点击下一步-点击完成即可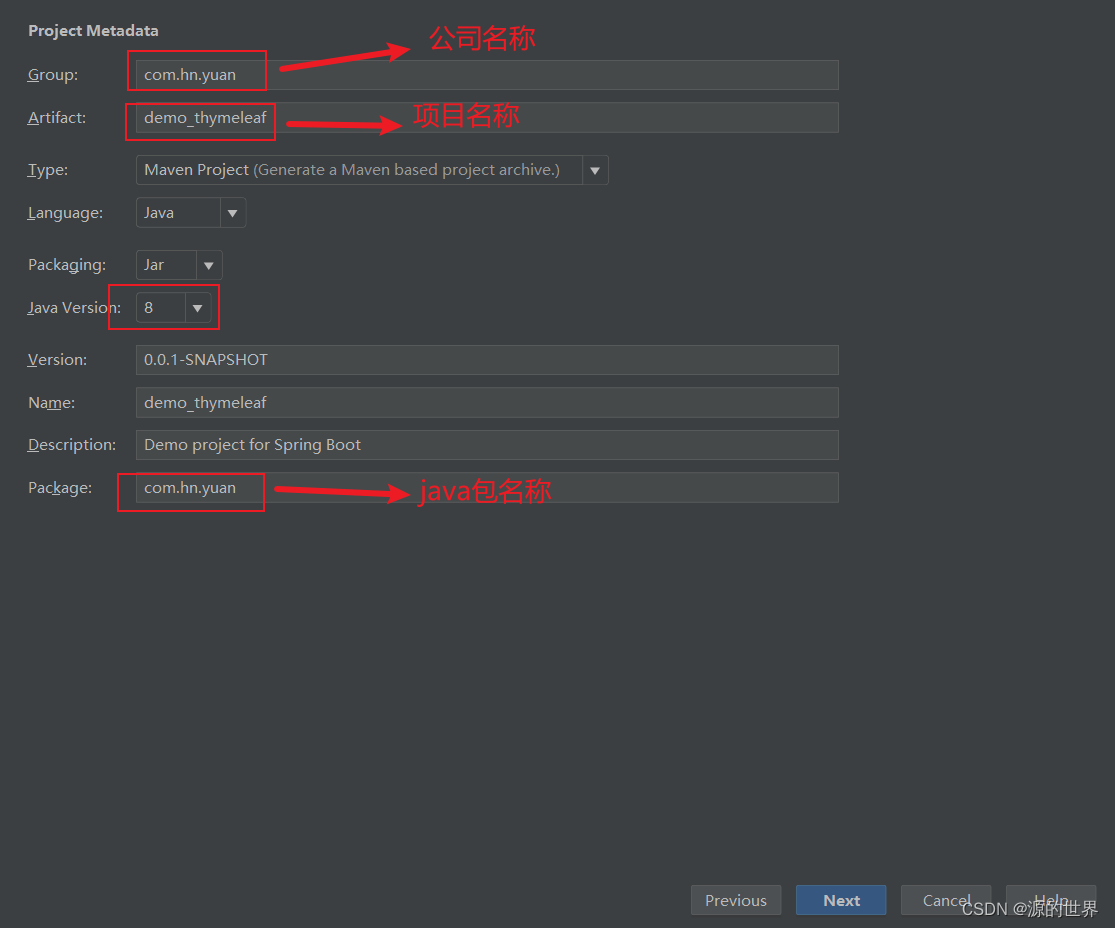
注意:需要配置下自己本地Maven地址
⑵项目-完整代码
pom.xmll
<?xml version="1.0" encoding="UTF-8"?><project xmlns="http://maven.apache.org/POM/4.0.0" xmlns:xsi="http://www.w3.org/2001/XMLSchema-instance" xsi:schemaLocation="http://maven.apache.org/POM/4.0.0 https://maven.apache.org/xsd/maven-4.0.0.xsd"> <modelVersion>4.0.0</modelVersion> <parent> <groupId>org.springframework.boot</groupId> <artifactId>spring-boot-starter-parent</artifactId> <version>2.7.5</version> <relativePath/> <!-- lookup parent from repository --> </parent> <groupId>com.hn.yuan</groupId> <artifactId>demo_thymeleaf</artifactId> <version>0.0.1-SNAPSHOT</version> <name>demo_thymeleaf</name> <description>Demo project for Spring Boot</description> <properties> <java.version>1.8</java.version> </properties> <dependencies> <!--添加thymeleaf的依赖--> <dependency> <groupId>org.springframework.boot</groupId> <artifactId>spring-boot-starter-thymeleaf</artifactId> </dependency> <!--spring项目启动器--> <dependency> <groupId>org.springframework.boot</groupId> <artifactId>spring-boot-starter-web</artifactId> </dependency> <!--通过注解消除实际开发中的样板式代码--> <dependency> <groupId>org.projectlombok</groupId> <artifactId>lombok</artifactId> <optional>true</optional> </dependency> <!--spring项目测试启动器--> <dependency> <groupId>org.springframework.boot</groupId> <artifactId>spring-boot-starter-test</artifactId> </dependency> <!--mybatis-plus启动器--> <dependency> <groupId>com.baomidou</groupId> <artifactId>mybatis-plus-boot-starter</artifactId> <version>3.5.1</version> </dependency> <!--mysql数据库驱动--> <dependency> <groupId>mysql</groupId> <artifactId>mysql-connector-java</artifactId> <version>5.1.35</version> </dependency> <!--代码生成器--> <dependency> <groupId>com.baomidou</groupId> <artifactId>mybatis-plus-generator</artifactId> <version>3.4.1</version> </dependency> <!--模板引擎--> <dependency> <groupId>org.apache.velocity</groupId> <artifactId>velocity-engine-core</artifactId> <version>2.1</version> </dependency> </dependencies> <build> <plugins> <plugin> <groupId>org.springframework.boot</groupId> <artifactId>spring-boot-maven-plugin</artifactId> </plugin> </plugins> </build></project>application.properties层
#配置端口号;server.port=8081#配置数据源;spring.datasource.driver-class-name=com.mysql.jdbc.Driverspring.datasource.url=jdbc:mysql://localhost:3306/yuan_productlist?useUnicode=true&characterEncoding=UTF-8&useSSL=falsespring.datasource.username=rootspring.datasource.password=root#关闭 springboot 中 thymeleaf 中的缓存, 默认为 true;spring.thymeleaf.cache=falsecontroller层
package com.hn.yuan.controller;import org.springframework.stereotype.Controller;import org.springframework.ui.Model;import org.springframework.web.bind.annotation.GetMapping;import org.springframework.web.bind.annotation.RequestMapping;@Controller@RequestMapping("/roles")public class ListController { @GetMapping("/list") public String getList(Model model){ model.addAttribute("msg","Thymeleaf"); return "list"; }}templates文件夹下的 list.html页面
<!DOCTYPE html><html xmlns:th="http://www.thymeleaf.org"><!--导入命名空间:namespace = ns--><head> <meta charset="UTF-8"> <title>Thymeleaf模版集成完毕!</title> <!--引入bootstrap框架相关的样式; --> <link rel="stylesheet" href="/bootstrap/css/bootstrap.css"/> <script src="/bootstrap/js/bootstrap.min.js"></script></head><body><div class="container"> <div class="panel panel-primary"> <div class="panel-heading"> <h1>Thymeleaf模版集成完毕!</h1> </div> <div class="panel-body"> <table class="table table-striped table-bordered table-hover table-condensed text-center"> <tr> <td>角色编号</td> <td>角色名称</td> <td>操作</td> </tr> <tr> <td th:text="1"></td> <td th:text="admin"></td> <td> <a href="#" class="btn btn-success">修改</a> <a href="#" class="btn btn-danger">删除</a> </td> </tr> </table> </div> <div class="panel-footer text-right"> Thymeleaf模版集成完毕! </div> </div></div></body></html>页面中我使用了 bootstrap样式,可自行下载,放入static文件夹下。官网下载地址分享
也可进入百度网盘分享地址:样式分享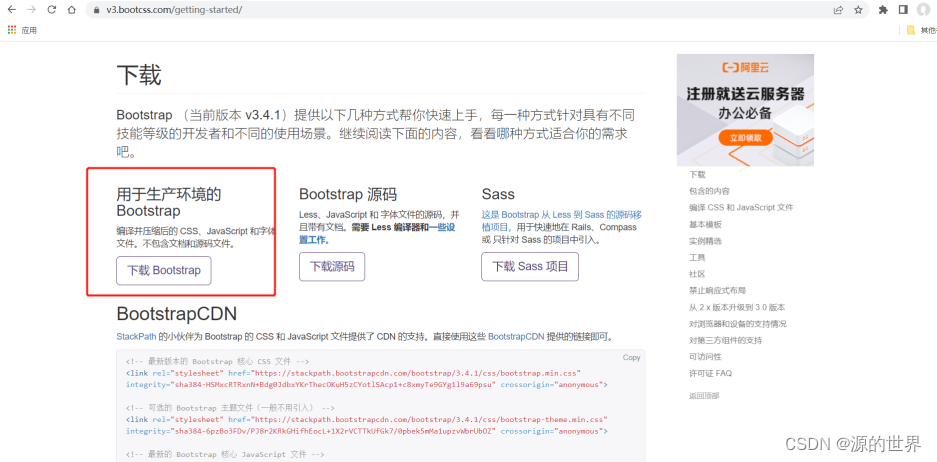
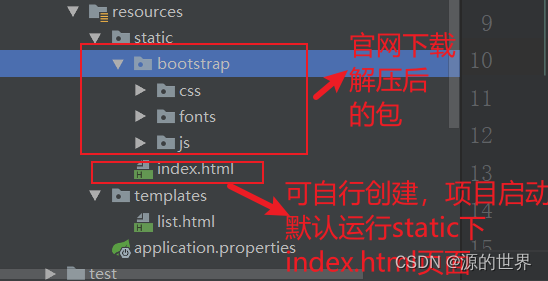
⑶效果图
项目架构: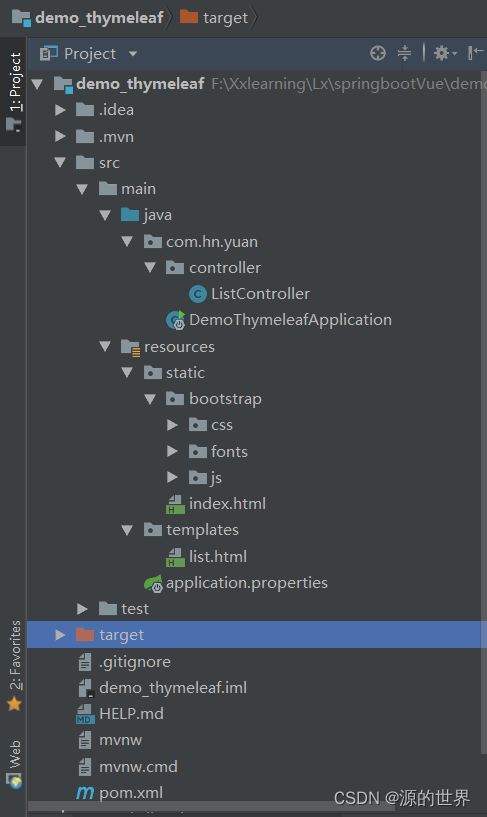
访问地址:http://localhost:8081/roles/list
2、对Thymeleaf的基础认识
⑴创建模板
创建一个 HTML 模板文件:
<!DOCTYPE HTML><html xmlns:th="http://www.thymeleaf.org"><head> <title>Index Page</title> <meta http-equiv="Content-Type" content="text/html; charset=UTF-8" /></head><body> <p th:text="${message}">Welcome to BeiJing!</p></body></html>通过引入 Thymeleaf 命名空间。th:text用于处理p标签体的文本内容。该模板文件直接在任何浏览器中正确显示,浏览器会自动忽略它们不能理解的属性th:text。但这不是一个真正有效的 HTML5 文档,因为 HTML5 规范是不允许使用th:*这些非标准属性的。我们可以切换到 Thymeleaf 的data-th-*语法,以此来替换th:*语法:
<!DOCTYPE HTML><html xmlns:th="http://www.thymeleaf.org"><head> <title>Index Page</title> <meta http-equiv="Content-Type" content="text/html; charset=UTF-8" /></head><body> <p data-th-text="${message}">Welcome to BeiJing!</p></body></html>HTML5 规范是允许data-*这样自定义的属性的。th:*和data-th-*这两个符号是完全等效且可以互换的。但为了简单直观和代码的紧凑性,本文采用th:*的表示形式。
⑵使用文本
首先介绍两个最基础的th:*属th:text和th:utext,它们都是用于处理文本消息内容。
th:text
在标签体中展示表达式评估结果的文本内容:
| 1 |
|---|
使用外部化的文本内容:
| 1 | Welcome to BeiJing! |
|---|
当它作为静态文件直接运行时,浏览器会自动忽略它不能识别的th:text属性,而显示
标签体的文本内容Welcome to BeiJing!
当它作为模板文件运行在服务器端时,th:text属性的具体值将会替换
标签体的文本内容。
th:utext
属性th:utext与th:text的区别在于:
假设:message = “Welcome to BeiJing!”。
使用th:text属性:
| 1 |
|---|
th:text效果:Welcome to BeiJing!
使用th:utext属性:
| 1 |
|---|
th:utext效果:Welcome to BeiJing!
⑶标准表达式语法
Thymeleaf 提供了非常丰富的标准表达式语法,总共有 8 大类:
简单表达式字面值文本操作算术运算布尔运算比较和相等条件运算无操作符⑷条件判断
条件判断语句有三种,分别是:th:if、th:unless、th:swith。
想要了解更多
请点击 转载链接

各位看官》创作不易,点个赞!!!
诸君共勉:万事开头难,只愿肯放弃。
免责声明:本文章仅用于学习参考