一. 安装gstreamer
1.1 Windows下安装
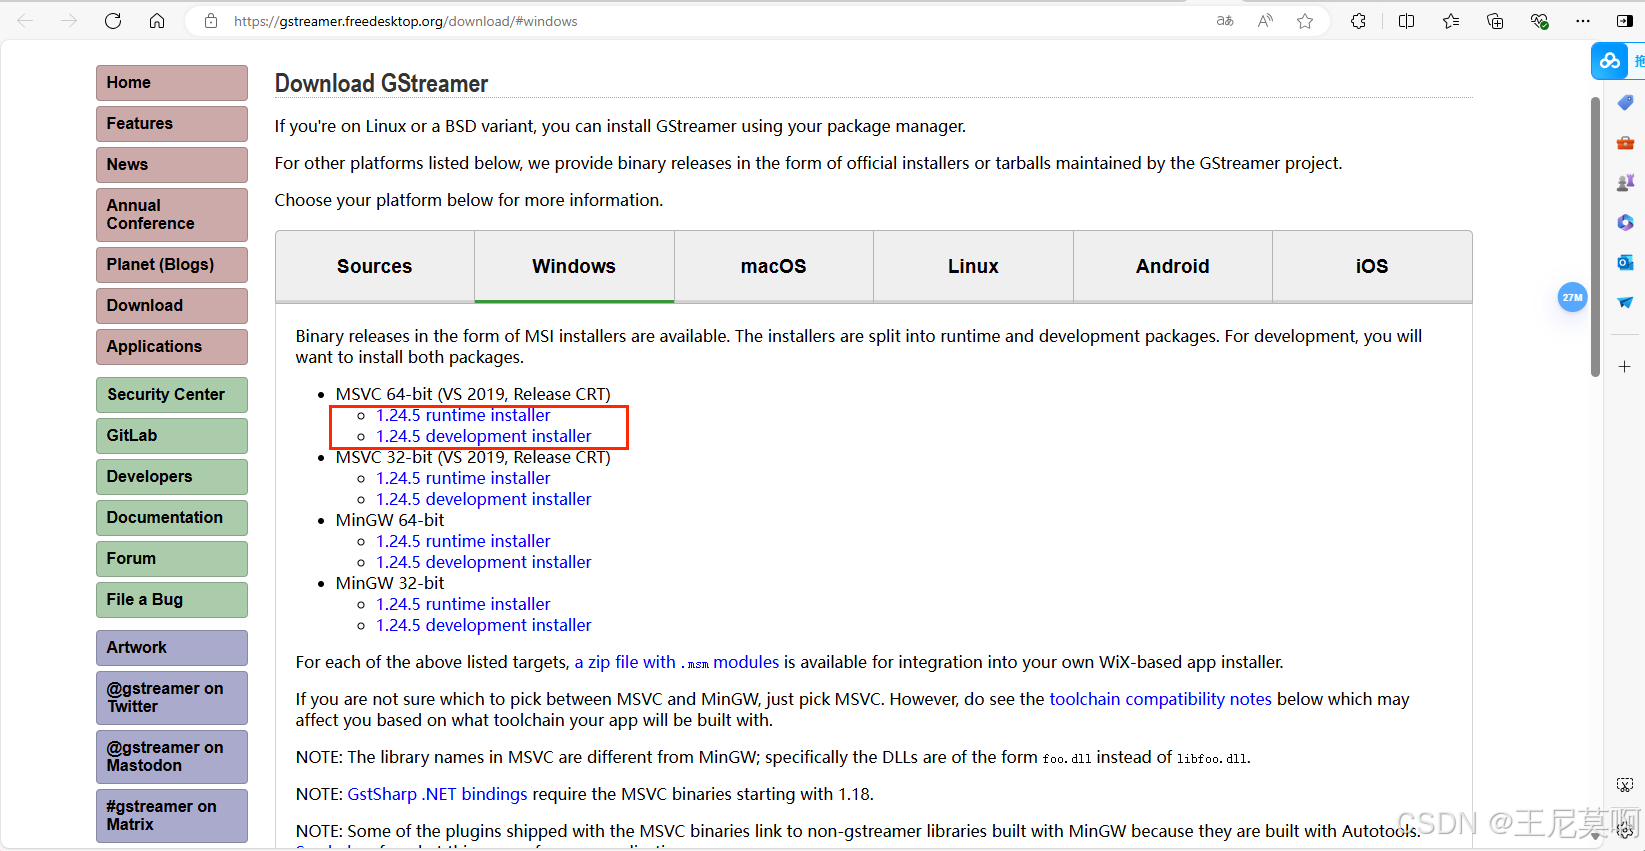
官网链接:https://gstreamer.freedesktop.org/download/#windows

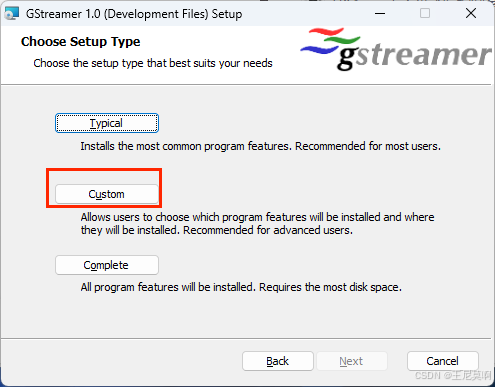
两个都要下载。安装的时候,在custom选择安装路径。然后返回上一步选择complete完全安装,两个安装方式一样。

1.2 配置环境
将 D:\gstreamer\1.0\msvc_x86_64\bin 添加至环境变量
在vs工程中使用:
在c/c++ -------常规--------附加包含目录 增加如下目录D:\gstreamer\1.0\msvc_x86_64\include\gstreamer-1.0
D:\gstreamer\1.0\msvc_x86_64\include\glib-2.0
D:\gstreamer\1.0\msvc_x86_64\include\libxml2
D:\gstreamer\1.0\msvc_x86_64\include
D:\gstreamer\1.0\msvc_x86_64\lib
链接器----输入-----附加依赖性 增加gobject-2.0.lib;glib-2.0.lib;gstreamer-1.0.lib
调试----环境path=%path%;F:\gstreamer\1.0\x86\bin
1.3 Ubuntu下安装
首先更新系统的软件包
sudo apt-get updatesudo apt-get install libgstreamer1.0-dev libgstreamer-plugins-base1.0-dev libgstreamer-plugins-bad1.0-dev gstreamer1.0-plugins-base gstreamer1.0-plugins-good gstreamer1.0-plugins-bad gstreamer1.0-plugins-ugly gstreamer1.0-libav gstreamer1.0-tools gstreamer1.0-x gstreamer1.0-alsa gstreamer1.0-gl gstreamer1.0-gtk3 gstreamer1.0-qt5 gstreamer1.0-pulseaudio安装完成后,检查GStreamer是否安装正确。
gst-inspect-1.0 --version显示版本说明成功安装。
二. 测试
2.1 命令行测试
gst-launch-1.0.exe -v playbin uri=file:/C:\\Users\\26366\\Desktop\\宣传片成片.mp4输出视频即为成功。
2.2 c++测试
// GstreamerHelloWorld.cpp : 此文件包含 "main" 函数。程序执行将在此处开始并结束。//#include <iostream>#include <gst/gst.h>#include <glib.h>int main(int argc, char* argv[]) {GstElement* pipeline;GstElement* source, * filter, * sink;//initgst_init(&argc, &argv);//creat pipelinepipeline = gst_pipeline_new("my-pipline");create elementssource = gst_element_factory_make("fakesrc", "source");filter = gst_element_factory_make("identity", "filter");sink = gst_element_factory_make("fakesink", "sink");//将元组添加到管道中gst_bin_add_many(GST_BIN(pipeline), source, filter, sink, NULL);//连接if (!gst_element_link_many(source, filter, sink, NULL)) {g_warning("failed to link elements\n");std::cout << "failed to link elements!\n";}else{std::cout << "Hello GStreamer!\n";}/*在链接不同的组件之前,你需要确保这些组件都被加在同一个箱柜中,因为将一个组件加载到一个箱柜中会破坏该组件已存在的一些链接关系。同时,你不能直接链接不在同一箱柜或管道中的组件。*/return 0;}输出Hello GStreamer!即为配置成功。
三.应用
3.1 例一:udp裸流,未使用RTP封装
编码:
gst-launch-1.0 filesrc location=C:\\Users\\26366\\Desktop\\宣传片成片.mp4 ! qtdemux ! avdec_h264 ! x264enc ! udpsink host=192.168.0.105 port=5600对应解码:
gst-launch-1.0 udpsrc port=5600 ! h264parse ! avdec_h264 ! videoconvert ! autovideosinkc++解码:
// GstreamerHelloWorld.cpp : 此文件包含 "main" 函数。程序执行将在此处开始并结束。//#include <iostream>#include <gst/gst.h>#include <glib.h>static GstElement* pipeline = nullptr;static GstBus* bus = nullptr;static GstMessage* msg = nullptr;// 回调函数,用于处理 GStreamer 消息static gboolean on_message(GstBus* bus, GstMessage* msg, gpointer data) {GError* err;gchar* debug_info;switch (GST_MESSAGE_TYPE(msg)) {case GST_MESSAGE_ERROR:gst_message_parse_error(msg, &err, &debug_info);g_printerr("Error received from element %s: %s\n", GST_OBJECT_NAME(msg->src), err->message);g_printerr("Debugging information: %s\n", debug_info ? debug_info : "none");g_clear_error(&err);g_free(debug_info);g_main_loop_quit((GMainLoop*)data);break;default:break;}return TRUE;}int main(int argc, char* argv[]) {gst_init(&argc, &argv);gst_debug_set_active(TRUE);gst_debug_set_default_threshold(GST_LEVEL_DEBUG);GMainLoop* loop = g_main_loop_new(NULL, FALSE);// 创建 GStreamer 管道pipeline = gst_parse_launch("udpsrc port=5600 ! h264parse ! avdec_h264 ! videoconvert ! autovideosink", NULL);bus = gst_element_get_bus(pipeline);gst_bus_add_watch(bus, on_message, loop);gst_object_unref(bus);// 开始播放gst_element_set_state(pipeline, GST_STATE_PLAYING);// 运行主循环g_print("Playing stream...\n");g_main_loop_run(loop);// 清理gst_element_set_state(pipeline, GST_STATE_NULL);gst_object_unref(pipeline);g_main_loop_unref(loop);return 0;}3.2 例二,使用RTP封装
编码
gst-launch-1.0 v4l2src device=/dev/video0 ! videoconvert ! 'video/x-raw,format=(string)NV12,width=640,height=480,framerate=(fraction)30/1' ! queue ! x264enc ! udpsink host=127.0.0.1 port=5000 sync=false解码:
gst-launch-1.0 udpsrc port=5000 caps='application/x-rtp, media=(string)video, clock-rate=(int)90000, encoding-name=(string)H264' \ ! rtpjitterbuffer latency=200 \ ! rtspsrc ! avdec_h264 ! videoconvert ! autovideosink参数解释:
udpsrc port=5000:设置 GStreamer 从 UDP 端口 5000 接收数据。(可替换:rtspsrc ,filesrc ,v4l2src)caps:设置接收数据的属性,包括媒体类型(video)、时钟频率(90000,对应于 90 kHz的时钟,常用于视频)、编码名称(H264)。rtpjitterbuffer:用于处理网络抖动,latency参数设置为缓冲区的延迟时间(单位为纳秒)。rtspsrc:使用 RTP 流,需要使用 rtspsrc 而不是 udpsrcavdec_h264:H.264 视频解码器。videoconvert:用于转换视频到显示设备支持的格式。autovideosink:自动选择一个合适的视频渲染器(例如,X 服务器或 GL 渲染器)用来展示视频。gst-launch-1.0 udpsrc port=14556 caps=“application/x-rtp, media=(string)video, clock-rate=(int)90000, enc
oding-name=(string)H264” ! rtph264depay ! h264parse ! avdec_h264 ! videoconvert ! autovideosink