一、前言:
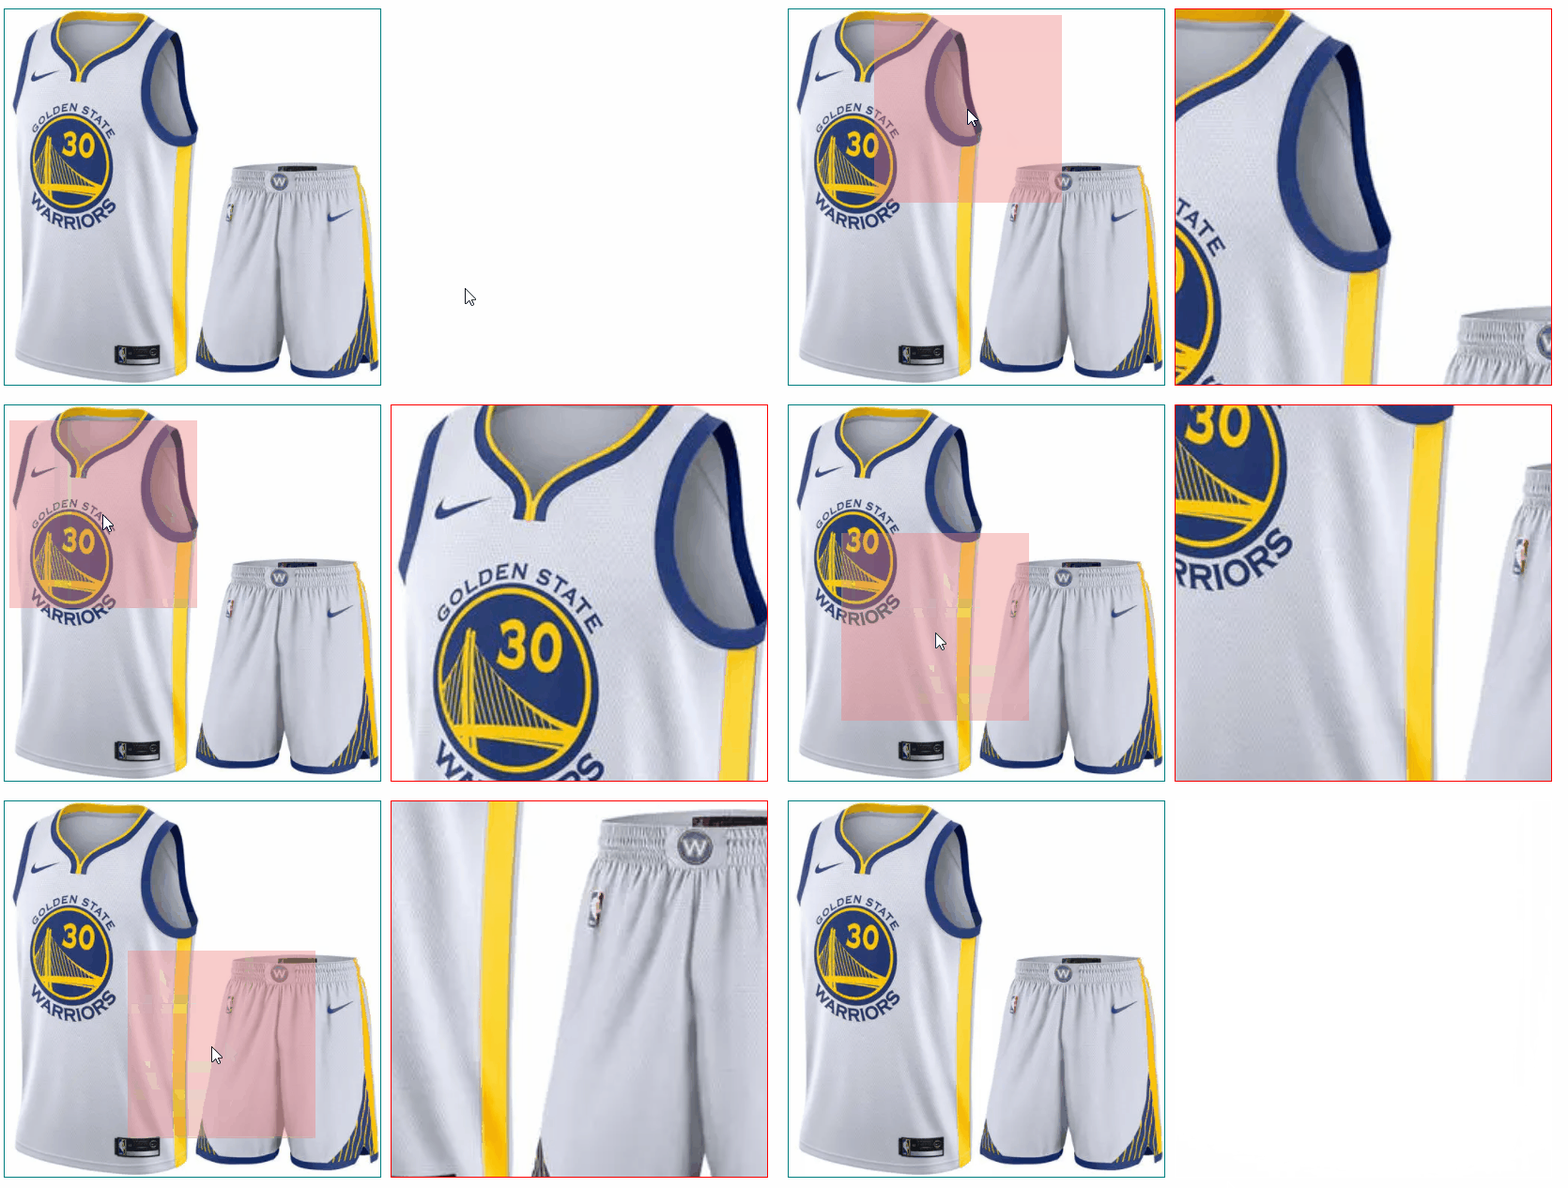
在这个鼎盛的电商时代各种直播带货或者自主逛宝购物,我们对商品的认知和了解进一步查看详情,发现我们的商品可以放大观看,于是心血来潮运用前端技术Vue框架,写了一个类似放大镜的功能
二、 实现思路:
对原图的显示空间(left) 可以将显示原图可 img 换成canvas,来对图片行进行保护 ,
跟随鼠标移动时显示放大的指示区(鼠标层罩top) ,显示层罩区域选中放大的显示空间(right)
三、效果展示

四、具体实现逻辑代码
template (记得改图片路径)
<template>
  <div>
    <div class="left">
      <img class="leftImg" src="../../src/assets/curry.jpg" alt="" />
      <!-- 鼠标层罩 -->
      <div v-show="topShow" class="top" :style="topStyle"></div>
      <!-- 最顶层覆盖了整个原图空间的透明层罩 -->
      <div
        class="maskTop"
        @mouseenter="enterHandler"
        @mousemove="moveHandler"
        @mouseout="outHandler"
      ></div>
    </div>
    <div v-show="rShow" class="right">
      <img
        :style="r_img"
        class="rightImg"
        src="../../src/assets/curry.jpg"
        alt=""
      />
    </div>
  </div>
</template>
style css
<style scoped>
/* 放大的图片,通过定位将左上角定位到(0,0) */
.rightImg {
  display: inline-block;
  width: 800px;
  height: 800px;
  position: absolute;
  top: 0;
  left: 0;
} /* 右边的区域图片放大空间 */
.right {
  margin-left: 412px;
  width: 400px;
  height: 400px;
  border: 1px solid red;
  position: relative;
  overflow: hidden;
} /* 一个最高层层罩 */
.maskTop {
  width: 400px;
  height: 400px;
  position: absolute;
  z-index: 1;
  top: 0;
  left: 0;
} /* 层罩,通过定位将左上角定位到(0,0) */
.top {
  width: 200px;
  height: 200px;
  background-color: lightcoral;
  opacity: 0.4;
  position: absolute;
  top: 0;
  left: 0;
} /* 原图的显示 */
.leftImg {
  width: 400px;
  height: 400px;
  display: inline-block;
} /* 原图的容器 */
.left {
  width: 400px;
  height: 400px;
  border: 1px solid teal;
  float: left;
  position: relative;
}
</style>
script 核心js
<script>
export default {
  data() {
    return {
      topStyle: { transform: "" },
      r_img: {},
      topShow: false,
      rShow: false,
    };
  },
  methods: {
    // 鼠标进入原图空间函数
    enterHandler() {
      // 层罩及放大空间的显示
      this.topShow = true;
      this.rShow = true;
    },
    // 鼠标移动函数
    moveHandler(event) {
      // 鼠标的坐标位置
      let x = event.offsetX;
      let y = event.offsetY;
      // 层罩的左上角坐标位置,并对其进行限制:无法超出原图区域左上角
      let topX = x - 100 < 0 ? 0 : x - 100;
      let topY = y - 100 < 0 ? 0 : y - 100;
      // 对层罩位置再一次限制,保证层罩只能在原图区域空间内
      if (topX > 200) {
        topX = 200;
      }
      if (topY > 200) {
        topY = 200;
      }
      // 通过 transform 进行移动控制
      this.topStyle.transform = `translate(${topX}px,${topY}px)`;
      this.r_img.transform = `translate(-${2 * topX}px,-${2 * topY}px)`;
    },
    // 鼠标移出函数
    outHandler() {
      // 控制层罩与放大空间的隐藏
      this.topShow = false;
      this.rShow = false;
    },
  },
};
</script>
五、总结思考
原本我是将三个鼠标事件添加在原图容器 left 上的,结果不断出现问题
1、在我加了一个覆盖了鼠标区域的透明层罩 maskTop 才让这个放大镜能完整的实现,若是不加这个 maskTop 层罩,在我鼠 标进入原图区域空间时鼠标层罩不会跟着鼠标的移动而移动,更是会在鼠标移动时进行高频率的“颤动”,右边的放大区域空间 也没有顺畅的跟着移动变化
2、若是没有添加 maskTop 层罩,在我鼠标移入原图区域空间时, mousemove 鼠标移动事件只执行了一次,似乎是因为鼠 标层罩阻挡了
3、在之前有试过动态地确定鼠标层罩的初始位置,将其放在了mouseenter事件当中,结果 mouseenter 事件执行了异常多次,就像是变成了 mousemove 事件
有看过其他的放大镜案例,但是他们都不需要加 masktop 这个最顶层的覆盖层罩,期望能有路过的大佬帮忙解惑